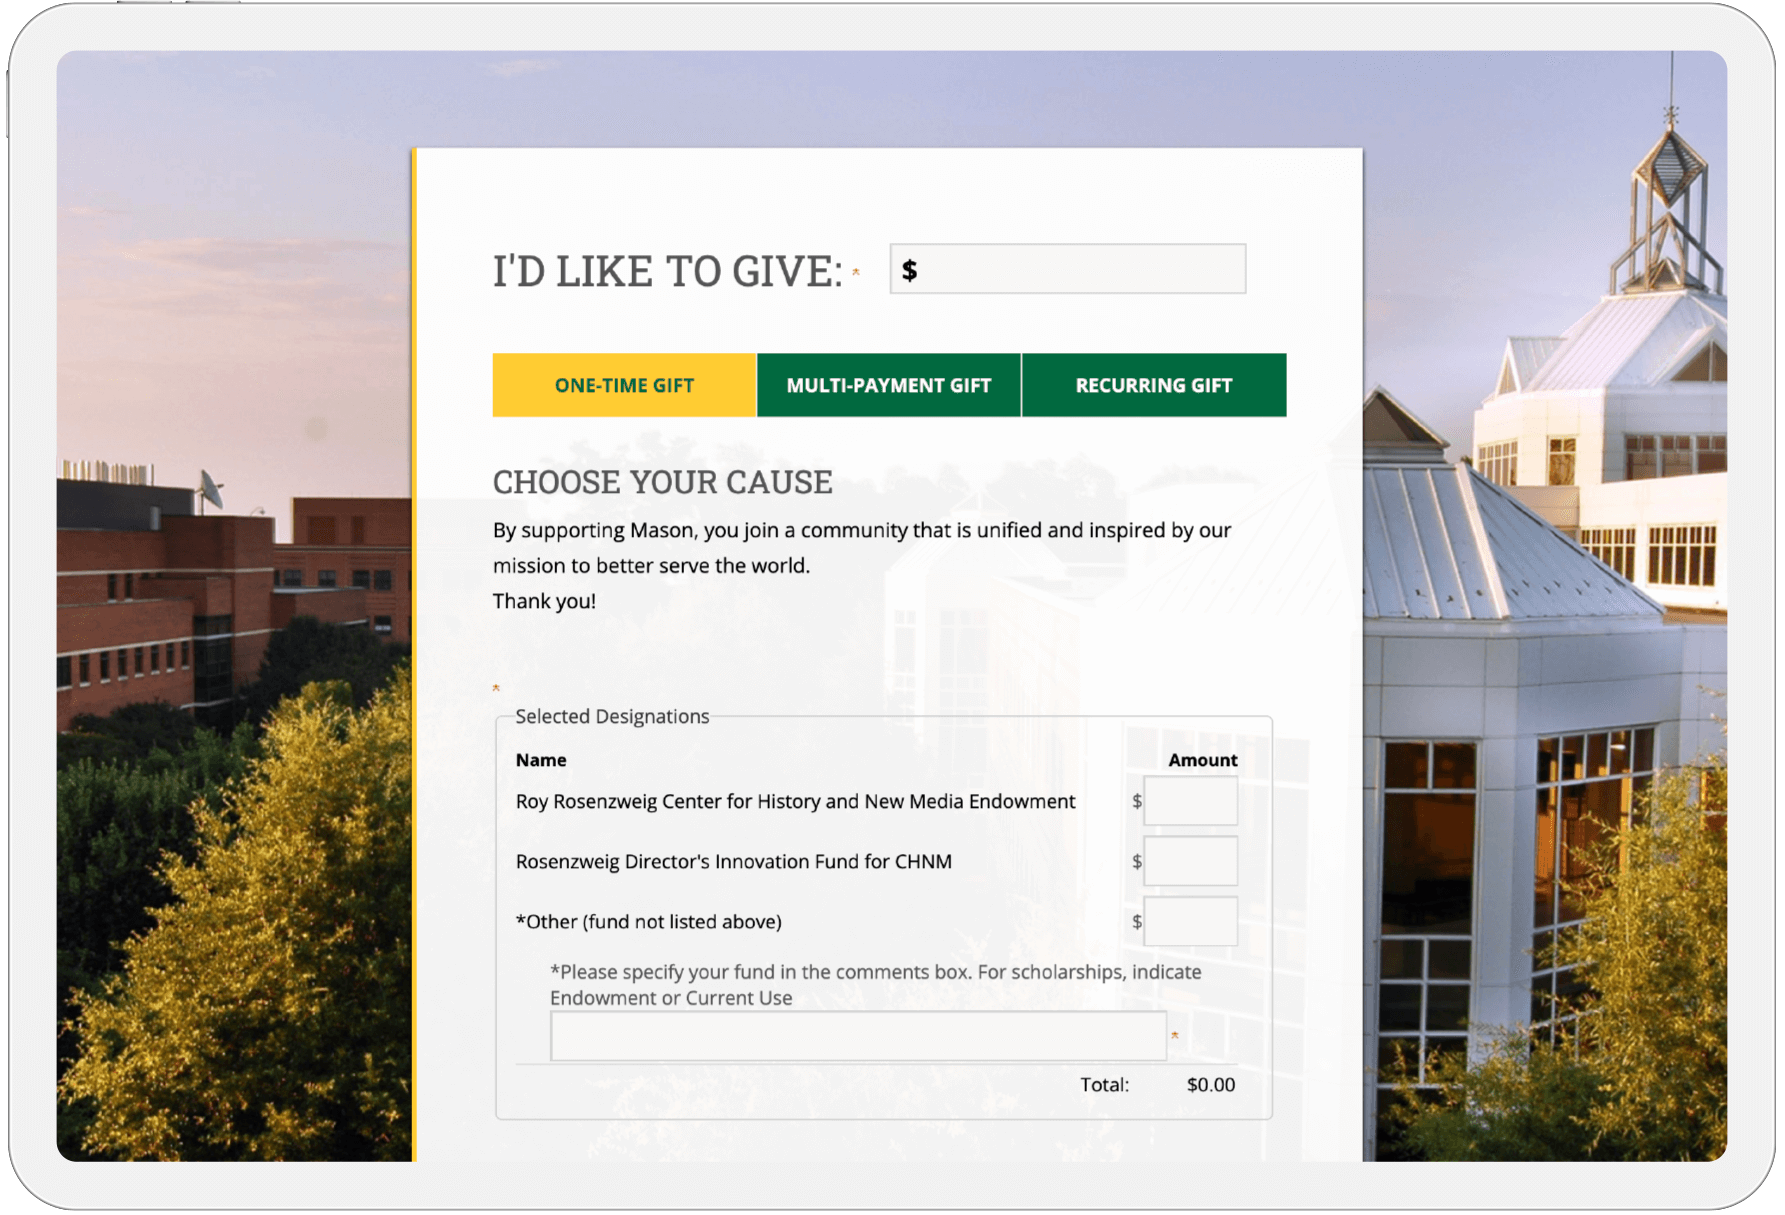
|
What Kind of Equipment Do I Need?
Audio Recorder and Tapes
|
|
| |
Air Force nurse waits on
the tarmac with a patient, DaNang, Vietnam. |
|
We recommend using a light, durable standard
audio cassette tape recorder with the following features: built-in
microphone, digital tape counter, battery indicator/recorder level
and a jack for external microphone (if available).
Make sure your tape recorder can be used
both with batteries and wall-outlet electricity.
Even with a built-in microphone, we recommend
using an external microphone, rather than a microphone encased in
the recorder itself, because it emits the least hiss
(background noise or machine noise) from within the recorder. Use
either a microphone that sits on a table facing the subject or a
lapel mike that clips to clothing.
Use only good quality C-60 (30 minutes
per side cassette tapes.) C-90 and C-120 cassettes are thinner and
tend to stretch and bleed. They also break more easily.
Video
Cameras
If
you plan to videotape the interview, use a camcorder capable of
fairly high picture quality, and if possible at last one external
microphone input and a microphone. You will need a tripod as well.
You should also
bring along extra batteries, video cassettes and power and extension
cords.
Labelling
Tapes
It's a good idea
to label your first tape before you begin. (This practice will also
minimize confusion when you turn over the tape the first time.)
Label each of your
tapes this way:
The name of
the interviewee
Your name, date and place of interview
Era/Service, i.e. WWII WAC
Length of Interview, i.e. 60 minutes
Number of tapes in sequence, i.e. tape 1 of 2
Before
going into the interview, record a brief introduction on Side 1
of the first tape as follows: My name is Rose Green and I
am interviewing my great-aunt Mildred Casey who served in the Women's
Army Corps as a driver in World War II. This interview is being
conducted October 17, 2002 in San Francisco, California, for the
Women in Military Service For America Memorial Foundation, Inc.
|